
Winter can be particularly harsh on old brick homes, causing cold air to seep through walls and structural damage from moisture. Understanding how to effectively winterproof your home is essential for comfort and preservation.
Winterproofing Your Old Brick Home
Old brick homes often have icy cold inside walls in winter because brick is porous and stores moisture. When temperatures drop, this moisture chills the walls and radiates cold into your rooms. Winterproofing starts by managing this moisture and sealing drafts to keep warm air inside and cold air out.
Brick’s porous nature means it absorbs rain and humidity. Without proper moisture control, trapped water freezes and thaws, damaging mortar and increasing heat loss. Exterior repairs to cracks and repointing mortar prevent water entry. Interior air sealing and insulation add barriers against cold air and reduce heat escape through gaps around windows, doors, and vents.
Windows and doors are major heat loss points in old brick homes. Upgrading to double-pane or adding storm windows cuts drafts and retains heat. Weatherstripping and door sweeps also block cold air. A seasonal maintenance checklist helps catch problems early, ensuring your winterproofing holds up year after year.
- Inspect Exterior Brick and MortarLook for cracks, crumbling mortar, and damaged bricks. Repair or repoint mortar to stop moisture entry.
- Seal Air Leaks InsideUse caulk or foam to seal gaps around windows, doors, and vents. Check attic and basement penetrations.
- Add InsulationInstall insulation in walls, attic, and crawl spaces if possible. Use materials suited for masonry walls to prevent moisture trapping.
- Upgrade Windows and DoorsReplace single-pane windows with double-pane or add storm windows. Install weatherstripping and door sweeps.
- Create a Maintenance ScheduleCheck for new cracks, mortar damage, and seal failures each fall. Clean gutters and ensure proper drainage away from the foundation.
| Winterproofing Step | Purpose |
|---|---|
| Exterior Brick Repair | Stops water from entering and freezing in the brick |
| Interior Air Sealing | Prevents drafts and heat loss |
| Insulation | Reduces heat transfer through walls and attic |
| Window and Door Upgrades | Blocks cold air and retains indoor warmth |
| Seasonal Maintenance | Keeps winterproofing effective over time |
| Appliance | Watts | Per hour | Per day (8 h) | Per month (30 days) |
|---|---|---|---|---|
| 1,500 W space heater | 1,500 W | 26¢ | $2.04 | $61.20 |
Winterproofing an old brick home requires attention to moisture, air sealing, insulation, and window upgrades. Each step tackles a specific cause of heat loss or cold penetration. This approach improves comfort and lowers heating costs. For detailed moisture management, exterior repairs, and insulation strategies, see the following sections.
Identifying and Managing Moisture Issues
Brick walls store moisture because brick is porous. When temperatures drop below freezing, trapped water expands and contracts in the freeze-thaw cycle. This cycle causes cracks and spalling, which weakens the brick and mortar.
Insulated brick houses keep warm by using a layer of insulation behind the brick, usually on the interior or in a cavity wall. This insulation reduces heat loss and keeps the brick warmer, which limits moisture freezing inside the wall.
Old houses often weather heat better than modern homes because their thick walls absorb and slowly release heat. However, the same porous nature that helps moderate temperature also makes them vulnerable to moisture damage without proper damp proofing.
Damp proofing is essential to prevent moisture from rising through the brick foundation or entering from outside. A damp proof course (DPC) or membrane installed at the base of the wall blocks moisture from the ground.
Breathable sealers protect brick by repelling liquid water while allowing trapped moisture vapor to escape. Use sealers labeled as vapor-permeable to avoid trapping moisture inside the brick, which would worsen freeze-thaw damage.
Avoid non-breathable coatings like paint or epoxy, which trap moisture. Instead, apply a breathable water repellent every five to seven years depending on exposure and manufacturer guidelines.
Steps for Exterior Inspection and Repair
Cold air can enter through brick vents, making rooms harder to heat. Seal vents with breathable materials like masonry wool or vent covers designed to block drafts while allowing airflow.
Brick house heating depends heavily on the building envelope. Exterior inspection and repair keep heat inside and moisture out.
- Inspect Mortar JointsLook for cracks, gaps, or crumbling mortar. Tuckpointing replaces damaged mortar with fresh mortar to restore wall strength and prevent drafts and moisture entry.
- Check Gutters and DownspoutsClean debris to ensure water flows away from the house. Repair leaks or sagging sections to avoid water pooling near the foundation.
- Examine Roof FlashingInspect flashing around chimneys, vents, and roof edges for gaps or rust. Proper flashing directs water off the roof and prevents leaks into brick walls.
- Evaluate Grading and DrainageGround should slope away from the foundation at least 6 inches over 10 feet. Poor grading causes water to pool near walls, increasing moisture problems.
Regular exterior inspection before winter helps catch issues that cause heat loss or water damage. Fixing mortar and drainage problems prevents cold drafts and costly repairs.
For detailed advice on sealing brick vents to stop cold air, see how to stop cold air coming through brick vents. For heating strategies suited to old brick houses, see brick house heating.
Interior Air Sealing and Insulation Strategies
Sealing drafts inside an old brick home is the most cost-effective way to keep heat in. Common sources include gaps around window and door frames, baseboards, electrical outlets, and where the brick meets wood framing.
- Locate DraftsUse a smoke stick or a lit incense stick near suspected gaps to see where air moves. Check outlets by feeling for cold air when the heater is running.
- Seal GapsApply caulk or foam sealant to small cracks under 1/4 inch wide. Use weatherstripping around doors and windows to block larger gaps. Install foam gaskets behind outlet covers.
- Insulate Solid WallsOld brick walls typically lack cavity insulation. Solid masonry walls can be insulated inside with rigid foam boards or mineral wool batts fitted between furring strips. Cover insulation with drywall or paneling.
Rigid foam insulation boards, like polyisocyanurate or extruded polystyrene, offer a high R-value per inch and resist moisture. Mineral wool batts are fire-resistant and allow walls to breathe, reducing moisture buildup risks.
The best insulation upgrades for old brick homes combine thorough air sealing with adding at least 2 inches of rigid foam inside walls. This raises wall R-values significantly without sacrificing interior space.
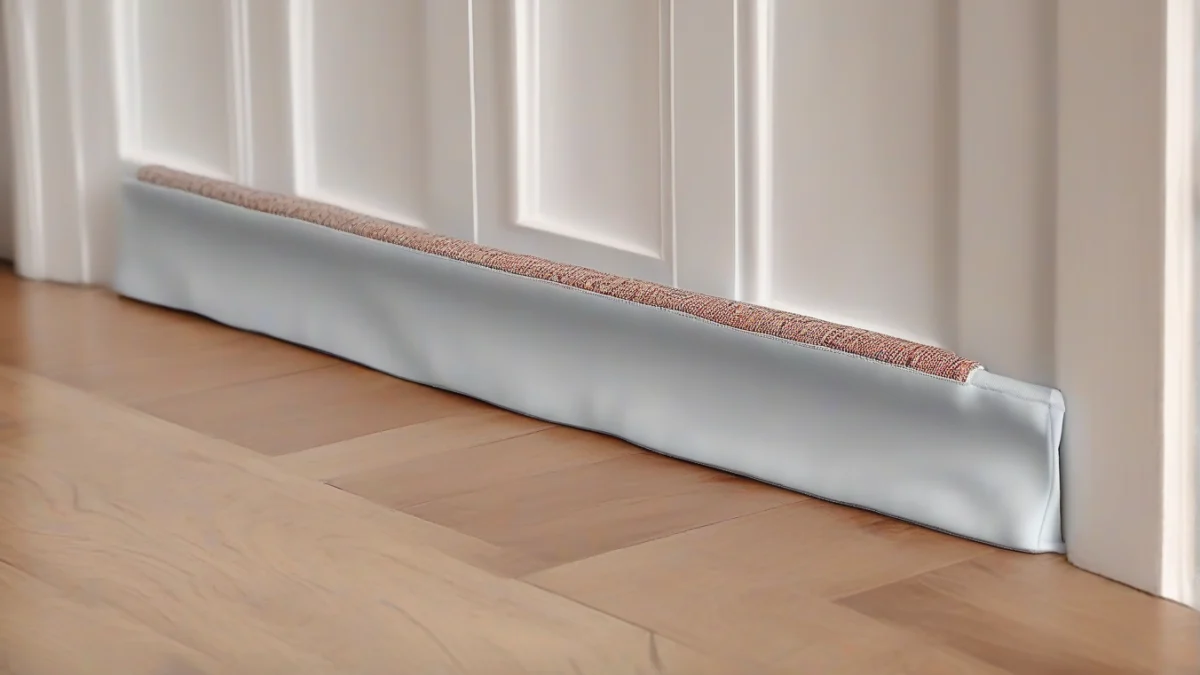
For cheaper insulation hacks, focus on sealing drafts aggressively and adding heavy curtains or thermal blinds over windows. Use removable draft stoppers on doors and insulate attic and basement spaces first for the biggest heat retention impact.
Upgrading Windows and Doors
Windows and doors are major heat loss points in old brick homes. Upgrading their sealing and insulation can cut drafts and reduce heating costs significantly.

Weatherstripping is the simplest upgrade. Apply adhesive-backed foam, felt, or V-strip weatherstripping around door and window frames to close gaps. Check annually and replace worn strips.
Storm windows add a layer of glass or acrylic over existing windows, creating an insulating air gap. They reduce heat loss by up to 50% and are easier to install than full window replacement.
Heavy window coverings like thermal curtains or cellular shades help trap heat inside. Close them at night and on cold, windy days to reduce radiant heat loss through glass.
The best heaters to warm cold brick walls are radiant panel heaters or oil-filled radiators. They deliver steady, gentle heat that warms surfaces and air without drying it out.
For drafty homes, convection heaters with fans can circulate warm air quickly, offsetting cold spots near windows and doors. Portable electric heaters with adjustable thermostats and tip-over protection offer flexible heating where you need it most.
- Apply WeatherstrippingClean window and door frames, then install weatherstripping to seal air leaks.
- Install Storm WindowsMount storm windows on the exterior or interior to create an insulating air space.
- Use Thermal Window CoveringsHang heavy curtains or cellular shades and keep them closed during cold periods.
Creating a Seasonal Maintenance Checklist
Maintaining your old brick home’s winterproofing requires regular care, especially before the cold season arrives. If you have a holiday home unused for months, winterproofing it before winter is critical to avoid moisture damage and heat loss.
Start your fall maintenance by inspecting the exterior brickwork for cracks or mortar damage. Repairing these early prevents water infiltration that freezes and worsens damage. Check the condition of brick vents and seal or cover them if recommended by your inspection, as cold air through vents can undo your insulation efforts.
Next, examine window and door seals. Replace worn weatherstripping and apply caulk to any gaps. Check that all locks and latches close tightly to maintain the seal. If you have upgraded your windows or doors, ensure their protective coatings or films remain intact.
Inspect your attic and basement for signs of moisture or drafts. Add insulation or seal leaks as needed. Look for condensation or mold spots on interior brick walls, indicating ventilation or moisture issues that need addressing before winter.
| Task | What to Check or Do |
|---|---|
| Brickwork and mortar | Repair cracks and damaged mortar joints |
| Brick vents | Seal or cover if cold air enters |
| Windows and doors | Replace weatherstripping, caulk gaps, ensure tight closure |
| Attic and basement | Inspect for drafts and moisture, add insulation or seal leaks |
| Interior walls | Check for condensation or mold, improve ventilation if needed |
Regular inspections every fall and after severe weather keep your winterproofing intact. Prompt repairs save money by avoiding extensive damage. Keep a log of maintenance activities and note any recurring issues to track your home’s condition over time.
If you have a holiday home, winterproofing before leaving it unoccupied for the season is vital. Drain outdoor water lines, set the heating to a low temperature to prevent freezing, and secure all openings. Consider a remote monitoring system to check temperature and humidity levels while away.
Following this checklist each fall ensures your old brick home stays warm, dry, and damage-free through winter. Winterproofing is not a one-time job but a seasonal commitment to protect your investment and comfort.
Frequently Asked Questions
What are the best ways to insulate an old brick house?
How do I prevent cold drafts in my brick home?
What should I do if I find cracked mortar in my brick walls?
How can I check for moisture problems in my brick home?
What are the signs of freeze-thaw damage in brickwork?
When should I consider replacing my windows instead of repairing?
We go through insulating stone cottage walls step by step in a separate article.
Before you buy anything, it is worth looking at dealing with dampness indoors.
