
A large wardrobe on an external wall creates a cold pocket where heat escapes and condensation forms. The wall stays cold because no room air reaches it, and moisture from the room condenses on that cold surface behind the furniture. Over months, that moisture causes mold on the wall and sometimes on the wardrobe itself.
Insulating that gap stops heat flowing through the wall and raises the surface temperature enough to prevent condensation. The job takes a few hours and modest materials, but the methods differ depending on whether you can move the wardrobe or it is built in.
How to Insulate Behind a Wardrobe You Can Move
Slide rigid insulation board between the wardrobe and the wall, seal every edge with low-expansion foam, tape a polythene vapour barrier over the insulation, then push the wardrobe back. The vapour barrier stops warm indoor air reaching the cold wall, which prevents condensation and mold where you cannot see or clean.

A 25 mm PIR or phenolic board delivers better thermal resistance than 100 mm of fiberglass, fits in the narrow gap behind most wardrobes, and costs around £15 to £25 per sheet at UK builders’ merchants. Rigid board stays in place without fixings and won’t sag or compress over time.
- Empty and move the wardrobe forwardRemove all clothes, shelves and hanging rails to reduce weight. Pull the wardrobe at least one meter from the wall, or move it out of the room entirely if the gap is too narrow to work in. Check the wall for damp patches, peeling paint or black spots; if you find active mold, clean it with a dilute bleach solution and let the wall dry completely before insulating.
- Measure and cut the insulation boardMeasure the wall area the wardrobe will cover, then cut 25 mm PIR or phenolic board to fit, leaving a 5 mm gap around every edge. Use a fine-tooth handsaw or a sharp utility knife scored deeply on both sides. PIR board has a silver foil face; phenolic board is usually black or brown. Both offer thermal resistance around 0.55 to 0.60 m²K/W per 25 mm, far better than fiberglass or polystyrene of the same thickness.
- Push the board into placeSlide the cut board vertically into the gap behind where the wardrobe will sit. It should stand upright as a friction fit, held by the floor and ceiling or by the skirting board. If the board tilts or falls, cut thin wooden wedges to hold it plumb, or use a single strip of adhesive foam tape at the top edge to anchor it lightly to the wall.
- Seal every edge with low-expansion foamRun a bead of low-expansion polyurethane foam along the top, bottom and both side edges where the board meets the wall, floor, ceiling and skirting. Wipe away excess foam before it sets. This seal stops air moving behind the insulation, which would carry moisture to the cold wall and defeat the whole job.
- Tape a polythene vapour barrier over the insulationCut a sheet of 250-micron polythene (available as a damp-proof membrane from any builders’ merchant) slightly larger than the insulation board. Tape it over the board with aluminum foil tape or durable cloth tape, overlapping the tape onto the wall, floor and ceiling by at least 50 mm on all sides. The barrier must be continuous and airtight; even a small gap lets warm moist air through.
- Push the wardrobe back into positionSlide the wardrobe carefully back against the wall without tearing or puncturing the polythene. If the wardrobe has sharp corners or protruding fixings on its back panel, pad them with folded cardboard before pushing. Once in place, the wardrobe holds the insulation and vapour barrier firmly against the wall.
This approach works for any freestanding wardrobe you can pull forward. For wardrobes screwed to the wall or too heavy to move safely, insulating a built-in wardrobe on an external wall requires different materials and methods.
How to Insulate Behind a Built-In Wardrobe Without Removing It
Attach thin insulation directly to the wardrobe’s back panel when the unit cannot be moved. Reflective foil insulation or 10 to 15 mm rigid foam board glued to the back creates a barrier between the cold wall and the wardrobe interior, reducing heat loss and condensation risk without the need to dismantle fitted cabinetry.
This approach is less effective than insulating the wall itself—you are insulating the furniture, not the thermal bridge—but it still raises the surface temperature enough to prevent mold growth and stop cold drafts circulating through gaps. The key is sealing every edge where the wardrobe meets the wall, floor, and ceiling to eliminate air movement.
- Measure and cut the insulationMeasure the wardrobe’s back panel from inside. Cut reflective foil insulation or thin rigid board to fit, leaving a 10 mm gap around the perimeter for foam sealant. Foil insulation is easier to handle in tight spaces; rigid board offers slightly better thermal resistance.
- Attach the insulation to the wardrobe backUse spray adhesive or double-sided tape to fix the insulation to the wardrobe’s back panel. Press firmly and work from the center outward to avoid wrinkles or air pockets. The insulation should lie flat against the panel with no gaps at the edges.
- Seal the perimeterRun a bead of silicone caulk or low-expansion foam around every edge where the wardrobe meets the wall, floor, and ceiling. This stops cold air circulating behind the unit and prevents moisture-laden room air reaching the cold wall. Wipe excess caulk with a damp cloth before it sets.
- Check for gaps at shelves and railsIf the wardrobe has shelves or hanging rails that penetrate the back panel, seal those openings with caulk or foam. Even small gaps allow air to move freely, which defeats the purpose of insulating. Fill penetrations completely and trim any excess foam once cured.
Fitted wardrobes on external walls benefit most from this approach. The sealed air gap between the insulation and the wall acts as an additional thermal layer, reducing the temperature difference that drives condensation without requiring you to remove fixed units or disturb plumbing and wiring routed through the wardrobe cavity.
How to Insulate Behind Radiators and Storage Heaters
Slide thin reflective radiator panels—typically 3 to 6 mm thick—behind the radiator to bounce heat back into the room instead of warming the wall. These panels fit between the radiator and the wall without removal in most cases, reflecting radiant heat forward while allowing convection airflow around the radiator’s edges.

Reflective panels are foil-faced foam or bubble wrap designed for the high temperatures behind a radiator. They do not block airflow or trap heat the way thick insulation would. Cut them to size, slide them down behind the radiator brackets, and tape the edges to the wall with heat-resistant aluminum tape. The foil surface faces the radiator.
Storage heaters are different. They rely on airflow to distribute stored heat, with vents at the top and bottom that must stay clear. Insulating directly behind a storage heater blocks airflow, causes overheating, and reduces efficiency. Instead, insulate the wall around the heater—above, below, and to the sides—leaving a 100 mm clearance around the unit and its vents.
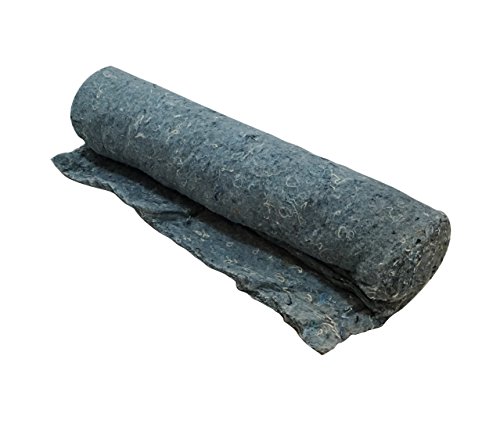
Carpet scraps and fabric insulation are common makeshift solutions, but they are ineffective and dangerous. Carpet chars at sustained high temperatures, releases smoke, and blocks the airflow a radiator needs to heat the room efficiently. Reflective panels cost a few pounds per square meter and do the job they are designed for without the risk.
For detailed measurements, bracket clearances, and step-by-step installation, see our guide on behind radiator insulation. If the radiator is on an external wall and the room stays cold despite the heater running, the wall itself may need insulation before the radiator can keep up.
Should You Insulate Behind Skirting Boards
Yes. Gaps behind skirting boards let cold air from the wall cavity draft into the room, and sealing them stops that air movement. Plaster filler blocks the visible gap but does nothing to stop airflow or insulate; expanding foam seals the cavity and adds thermal resistance. The difference is measurable: a room with sealed skirting boards feels warmer at the same thermostat setting because cold air no longer spills across the floor.
Remove the skirting board carefully—a utility knife along the top edge breaks the paint seal, then a pry bar lifts it away from the wall. Fill large voids with offcuts of rigid insulation board, then apply low-expansion foam into every remaining gap. High-expansion foam can bow the skirting when it cures, so use the low-expansion product sold for window and door frames. Let it cure for at least two hours.
- Seals airflow through the wall cavity
- Adds insulating value (R-value around 3.5 per inch)
- Flexible and stays sealed through seasonal movement
- Fills the visible gap only
- No thermal resistance
- Cracks open when the wall or floor shifts
Reattach the skirting board with the original nails or screws, then run a bead of decorators’ caulk along the top edge where it meets the wall. That final seal stops air leaking over the top. For full instructions and detailing around corners and pipes, see how to insulate behind skirting boards properly.
Walk-In Wardrobe and Dressing Room Insulation
A walk-in wardrobe built against an external wall needs the wall itself insulated, not a thin barrier behind furniture. The wall loses heat continuously, and without insulation the surface stays cold enough to condense moisture from the air onto stored clothes. Fix 50 to 75 mm PIR or phenolic insulation board directly to the masonry, cover it with a vapour barrier, then finish with plasterboard. The room shrinks by the thickness of the buildup—about 90 to 110 mm including the board—but the wall stays warm and dry.
- Fix insulation to the wallApply foil-faced PIR or phenolic board to the masonry with insulation adhesive or by screwing through into timber battens. Stagger the joints so no seam runs floor to ceiling.
- Tape the vapour barrierTape a continuous polythene vapour barrier over the insulation, overlapping sheets by 150 mm and sealing every edge to the floor, ceiling and adjoining walls with vapour barrier tape.
- Seal penetrationsCut the barrier neatly around pipes and cables, then tape or mastic the edges so no gap remains. Air leaks here let warm, moist room air reach the cold wall behind the insulation and condense.
- Finish with plasterboardScrew 12.5 mm plasterboard to the battens or directly through the insulation into the masonry with long fixings, skim the joints, then paint. The wall now reads as room temperature.
If the wardrobe contains electrical outlets or switches, the insulation changes how you detail around the boxes. Move the boxes forward or recess them into the new wall plane, and never pack insulation tightly behind a live electrical fitting without understanding the heat and fire safety implications. For safe detailing, see how to insulate behind electrical outlets.
What Causes Condensation and Mold Behind Wardrobes
The external wall behind a wardrobe stays several degrees colder than the rest of the room because no heated air circulates there. When warm, moisture-laden air from the room leaks into the narrow gap—through the space at the top, around the sides, or where the wardrobe does not sit flush—it meets that cold surface and cools rapidly. Air holds less water vapor as it cools, so the excess condenses into liquid droplets on the wall.
That dampness shows first as a musty smell or a clammy feel to the wallpaper. Within days, black mold colonizes the wet plaster, spreading fastest in the top corners where the ceiling and external walls meet and temperatures drop lowest. The wardrobe itself blocks light and airflow, giving mold the dark, still environment it needs.
Insulation fixes the problem by raising the wall surface temperature above the dew point—the temperature at which water vapor condenses. A 25 mm layer of PIR or phenolic board can lift the surface temperature by 5 to 8 °C, keeping it warm enough that moisture stays in the air instead of forming on the wall. Sealing the edges stops humid air from reaching the wall in the first place.
A cold bedroom with poor ventilation benefits from both insulation and better airflow. Even a trickle vent in the window or an extract fan in an adjoining bathroom helps move moisture out before it condenses. Pair that with heating solutions for cold bedrooms if the room itself stays below 16 °C through winter.
Frequently Asked Questions
Can I insulate behind a wardrobe without moving it?
What is the best insulation to put behind a built-in wardrobe?
Should I insulate behind a storage heater to protect the wall?
Does expanding foam insulate better than plaster filler behind skirting boards?
Can I use carpet or fabric to insulate behind a radiator?
How do I stop mold growing on the wall behind my wardrobe?
We cover how to reduce heat loss through your flooring in its own guide.
The other half of this decision is how to create a cheap thermal barrier at home.
