
Electrical boxes are cut into drywall, and the gap between the box and the drywall edge is rarely sealed during construction. On an exterior wall, that gap connects directly to the insulation cavity and, through it, to outdoor air. Wind pressure pushes cold air through the gap, around the outlet, and into the room.
Sealing these gaps stops the air leak. It does not require rewiring or moving the box. The tools are simple, the materials cost a few dollars per outlet, and the result is immediate: less draft, warmer walls, and lower heating costs.
How to Insulate Behind Electrical Outlets Step by Step
Place a pre-cut foam gasket behind the outlet cover plate, or fill gaps around the electrical box with low-expansion spray foam after turning off the power at the breaker. The gasket sits between the wall surface and the cover plate to block drafts; spray foam fills the space between the box and the drywall where larger gaps let cold air through.

Outlets and switches on exterior walls create two draft paths: air leaks around the electrical box itself where it meets the drywall, and gaps between the wall and the cover plate. Both let conditioned air escape and cold air seep in. The fix takes fifteen minutes per outlet and requires no special skills.
- Turn off power and verifySwitch off the breaker that controls the outlet. Use a non-contact voltage tester to confirm the outlet is dead by holding the tester near the outlet face; it will beep or light up if voltage is present. Test a working outlet first to confirm your tester functions.
- Remove the cover plate and inspectUnscrew the cover plate and pull it away from the wall. Look for gaps between the electrical box and the drywall, and check whether you feel air movement with your hand near the box edges. Small drafts around the cover plate need only a gasket; visible gaps around the box itself require foam.
- Install foam gasket or apply spray foamFor minor drafts, place a pre-cut foam gasket over the outlet so the openings align with the receptacle or switch, then reinstall the cover plate over it. For gaps around the box, use low-expansion spray foam rated for electrical work, filling gaps no more than halfway since the foam expands. Keep foam away from terminals and wires inside the box.
- Reassemble and restore powerScrew the cover plate back into place, making sure it sits flush and the gasket does not bunch or fold. Turn the breaker back on and test the outlet with a lamp or phone charger to confirm it works. Check that the cover plate feels snug against the wall with no give when pressed.
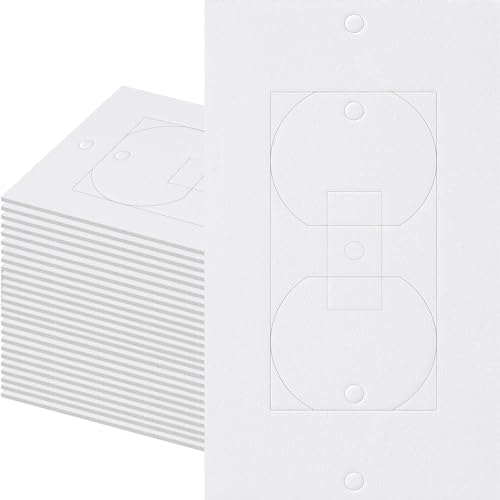
Foam gaskets work for most interior outlets where the box is properly installed and the only draft comes from the cover plate gap. Spray foam handles larger gaps common in older homes where the drywall was cut oversized or the box sits loose. Some outlets need both: foam around the box and a gasket under the plate.
If you feel cold air after installing gaskets and sealing around the box, the wall cavity itself may lack insulation. Outlets on exterior walls often reveal missing or settled insulation behind them, which requires a different approach covered in the next section. Fixing cold spots behind furniture follows similar principles: find the air path, block it, and verify the draft stops.

How to Insulate Around Electrical Boxes on Exterior Walls
Outlets on exterior walls leak the most air because the temperature difference between indoors and outdoors drives cold drafts through every unsealed gap. The space between the electrical box and the drywall is the largest opening, and sealing it stops the bulk of the air movement you feel when you hold your hand near the switch plate.
Turn off power at the breaker, remove the cover plate, and inspect the perimeter of the box where it meets the drywall. You will see a gap, sometimes a quarter inch or more, running around all four sides. Apply low-expansion spray foam into that gap, working around the box in a steady bead. Keep the foam tip aimed at the space between box and drywall, not into the box itself where wires are present.
Low-expansion foam is required because standard expanding foam can warp the box or push the drywall outward, creating a bulge you will see under the cover plate. Fire-rated foam is the better choice for exterior walls, where building codes often require fire blocking at wall penetrations. The foam cures in about an hour; trim any excess with a utility knife once it is firm.
If the back of the electrical box is open to the wall cavity—common in older construction—do not attempt to foam that opening. The box needs to remain accessible per electrical code, and foam behind the box can trap moisture or block future work. Instead, seal only the perimeter gap between box and drywall, then place a foam gasket behind the cover plate for an additional air seal at the faceplate.
After the foam cures and you have trimmed it flush, reinstall the outlet or switch, add the foam gasket, and screw the cover plate back on. The draft will stop. Check other outlets on the same exterior wall; if one leaks, the others usually do as well.
Insulating Behind Outlets Near Radiators and Storage Heaters
An outlet on the same wall as a radiator or storage heater pulls cold air through the gap behind the cover plate, undermining the heater’s work. The heater warms the room while cold air seeps in from the wall cavity, creating a draft along the floor and forcing the heater to run longer. Sealing the outlet stops that air exchange and keeps the heat where you want it.
Use the same foam gasket or low-expansion spray foam methods described earlier. Turn off power at the consumer unit, remove the cover plate, and either press a pre-cut foam gasket into place or foam the gap between the electrical box and the plasterboard. Once the outlet is sealed, consider adding reflective foil behind the radiator to bounce heat back into the room instead of warming the external wall.
Reflective radiator foil is the only safe material to place directly behind a radiator or storage heater. Carpet, thick foam, or cardboard behind a heater is a fire hazard; these materials can ignite or smolder when exposed to sustained heat. Foil reflects radiant heat without combusting, and it installs with double-sided tape or foil adhesive against the wall surface, not touching the heater itself.
Start with the outlets. Sealing them takes fifteen minutes and stops the draft immediately. Adding foil behind the heater is a separate step that improves efficiency but does not replace sealing the air leaks first.
What Causes Drafts From Electrical Outlets
The gap between the electrical box and the drywall is rarely caulked during construction. Builders cut the drywall opening, slide the box into place, and screw on the cover plate, leaving a ring of space where the box meets the wall. That gap connects directly to the wall cavity, and on an exterior wall, the cavity connects to outdoor air through gaps in the siding, sheathing seams, and penetrations for pipes or wires.
Wind pressure and the stack effect push air through the cavity and out through the outlet gap. Wind hits the exterior wall and forces cold air into any crack it finds. Inside, warm air rises toward the ceiling and escapes through upper leaks, pulling replacement air in through lower openings. The outlet becomes part of a convective loop: warm indoor air rises and escapes, cold air enters low through outlets near the floor or midway up the wall.
Recessed boxes in exterior walls are the worst offenders. A recessed box sits deeper in the wall cavity than a flush-mount box, exposing more of its sides to the cold air channel. The larger surface area and deeper recess give air more paths to flow around the box and through the cover plate gap. You feel the draft most on cold, windy days when both wind pressure and stack effect work together.
Foam Gaskets vs Spray Foam: Which to Use
Foam gaskets work for outlets with small or no visible gap around the box, or for renters who cannot alter the walls. A gasket is a pre-cut foam pad that sits between the outlet and the cover plate, sealing the opening without touching the electrical components. It installs in 30 seconds per outlet: turn off the power, unscrew the plate, slide the gasket over the outlet, and reattach the plate. Gaskets are reversible, leave no residue, and cost less than a dollar each.
Spray foam is needed when the gap around the box is 1/8 inch or wider. The gasket alone cannot seal a gap that large because air flows around the box itself, not just through the cover plate opening. Use only low-expansion foam; high-expansion foam exerts enough pressure to warp the electrical box or push it out of alignment, creating a fire hazard. Low-expansion foam labeled for windows and doors is safe. It takes 2 to 3 hours to cure before you can trim the excess and replace the cover plate.
| Method | Best for | Install time | Reversible |
|---|---|---|---|
| Foam gasket | Small gaps, rental homes, DIY-friendly quick fix | 30 seconds per outlet | Yes |
| Low-expansion spray foam | Gaps 1/8 inch or wider, owned homes, permanent seal | 2 to 3 hours cure time | No |
- Installs in seconds with no mess or curing time
- Fully reversible and leaves no residue
- Safe for renters and anyone uncomfortable using spray foam
- Requires careful product selection; high-expansion foam can damage boxes
- Permanent once cured; cannot be removed without damaging drywall
- Takes hours to cure and requires trimming excess foam
Many homes benefit from both. Use spray foam around the box perimeter where the gap is wide, let it cure, then add a gasket behind the cover plate for a double seal. The combination stops drafts at both the box-to-wall gap and the plate-to-wall gap, addressing the full air path. Insulating behind skirting boards uses a similar approach: seal the structural gap first, then add a surface seal.
Other Air Leaks Behind Walls Worth Sealing
Outlets are not the only cold spots on an exterior wall. Baseboards, skirting boards, wardrobes, kitchen cabinets and any furniture pushed tight against drywall can all trap cold air behind them, especially where the wall meets the floor or ceiling. The same principle applies: seal the air leak first, then add insulation if the gap allows.
Should you insulate behind skirting boards? Yes, if cold air seeps from the gap where the skirting board meets the floor or wall. Insulate behind skirting boards by pulling the board away from the wall, sealing visible cracks with caulk or low-expansion foam, and sliding thin foam or reflective insulation into the cavity before reattaching the board. The same approach works for baseboards in US homes.
Insulating behind a large wardrobe on an external wall requires moving the wardrobe, checking for gaps around pipes or wiring, sealing them with foam or caulk, and attaching rigid foam board or reflective insulation directly to the wall before pushing the wardrobe back. Kitchen cabinets on exterior walls leak air where the cabinet back meets the drywall and where pipes enter the wall; seal those penetrations with caulk or expanding foam before closing the cabinet back up.
Whole-house air sealing targets the largest leaks: the top plate where the wall meets the attic, the bottom plate where the wall meets the foundation, pipe and wire penetrations, and recessed lights. An outlet gasket saves watts; sealing the attic floor can save hundreds of dollars a year. Start with the leaks you can feel, then move to the hidden ones.
Frequently Asked Questions
Can you put insulation directly behind an electrical outlet?
Is it safe to use spray foam around electrical boxes?
Do foam outlet gaskets really stop drafts?
Should I insulate outlets on interior walls?
How much does it cost to insulate all the outlets in a house?
Do I need an electrician to insulate behind outlets?
If that sounds like your room, read up on sealing socket draughts next.
We go through how to find cold drafts around switches step by step in a separate article.
