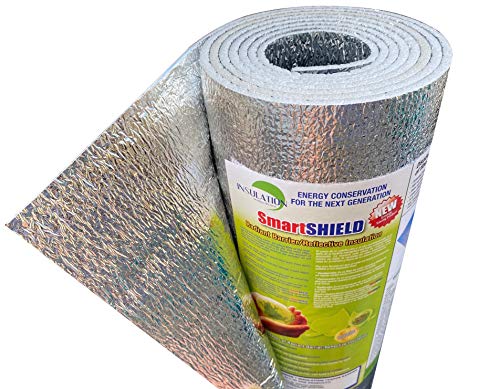
Proper insulation is crucial for maintaining a comfortable living environment and reducing energy costs. Selecting the right thickness of insulation depends on various factors, including building regulations, material properties, and the specific areas of your home.
How to Choose Insulation Thickness for UK Homes
The thickness you need depends on three things: the U-value target set by building regulations, the thermal conductivity (λ) of your insulation material, and where you’re insulating. Loft insulation typically needs 270 mm or more to meet current standards. Walls need 100 to 150 mm of cavity fill or solid wall insulation. Floors usually take 50 to 100 mm of rigid foam.
U-values measure heat loss through a building element in watts per square meter per degree Kelvin (W/m²K). Lower is better. UK Building Regulations Part L sets maximum U-values: 0.16 W/m²K for roofs, 0.18 W/m²K for walls, 0.18 W/m²K for floors in new builds. Retrofits and extensions have slightly relaxed targets, but meeting the tighter standards cuts heating costs more.
Each material conducts heat at a different rate. Mineral wool has a thermal conductivity around 0.035 to 0.040 W/mK. PIR foam boards sit at 0.022 to 0.023 W/mK, so they deliver the same thermal resistance in less thickness. EPS foam is around 0.035 W/mK. Cellulose is 0.035 to 0.040 W/mK. The lower the λ value, the thinner the layer you need to hit your U-value target.
| Building Element | Target U-Value (W/m²K) | Insulation Thickness (mm) | Common Materials |
|---|---|---|---|
| Loft or roof | 0.16 | 270 to 300 | Glass wool, mineral wool, PIR |
| Cavity wall | 0.18 | 100 to 150 | Mineral wool, EPS beads, foam |
| Solid wall (internal) | 0.30 | 90 to 120 | PIR boards, mineral wool batts |
| Solid wall (external) | 0.30 | 80 to 100 | EPS, mineral wool render board |
| Ground floor | 0.18 to 0.25 | 50 to 100 | XPS, PIR, mineral wool |
Building control or your architect determines the exact thickness for extensions and new builds. They calculate it using the target U-value, the existing construction’s thermal resistance, and the insulation product’s certified λ value from the manufacturer’s datasheet. For DIY loft top-ups, 270 mm of mineral wool meets the 0.16 W/m²K standard in most cases; check the product label to confirm.
- Measure what you haveCheck loft insulation depth with a tape measure. For walls, building records or a surveyor’s report will list the construction type and any existing cavity fill.
- Find your target U-valueNew builds and extensions must meet Part L targets: 0.16 for roofs, 0.18 for walls and floors. Retrofits aim for 0.16 to 0.18 where practical.
- Pick your materialCompare thermal conductivity (λ), cost per square meter, moisture resistance, and whether it fits your space. PIR boards work in tight spaces; mineral wool suits deep joists.
- Calculate thicknessUse the formula in calculating insulation thickness step-by-step, or check the manufacturer’s U-value tables for the thickness that hits your target.
Start with the loft. Heat rises, so upgrading from 100 mm to 270 mm of mineral wool can cut heat loss through the roof by half. Cavity walls come next: 100 mm of blown mineral wool or EPS beads fills a standard 100 mm cavity. Solid walls need internal dry lining with 90 to 120 mm of PIR and plasterboard, or external wall insulation with 80 to 100 mm of render board. Suspended timber floors take 50 to 100 mm of PIR between joists; solid floors need rigid insulation under a new screed.
For uninsulated roofs, see how to insulate an uninsulated roof. If your floor is cold, read how to warm a home with poor under-floor insulation. To repair damaged insulation, go to how to patch home insulation.

Calculating Insulation Thickness: Step-by-Step
The thickness of insulation needed depends on three numbers: the U-value you want to achieve, the U-value of your existing wall or roof, and the thermal conductivity (λ) of the material you’re installing. UK Building Regulations set minimum U-values—typically 0.16 W/m²K for new-build roofs and 0.18 W/m²K for walls—but you can aim lower for better performance.
- Find Your Current U-ValueCheck your Energy Performance Certificate (EPC) for the U-value of each building element, or estimate it from the construction type. A solid brick wall built before 1920 typically has a U-value around 2.1 W/m²K; a 1970s cavity wall with partial fill sits near 0.6 W/m²K. An uninsulated loft floor is usually 2.3 W/m²K. If you’re unsure, hire an energy assessor to measure it.
- Pick Your Target U-ValueUse 0.16 W/m²K for loft insulation and 0.18 W/m²K for walls if you’re following current regulations. For renovations, aim for the lowest U-value your budget and space allow—each 0.05 W/m²K improvement cuts heat loss by roughly 30 percent in a typical uninsulated wall.
- Calculate the Thermal Resistance NeededThermal resistance (R-value) is the inverse of the U-value: R = 1 ÷ U. Subtract the resistance you need (1 ÷ target U-value) from what you have (1 ÷ current U-value) to find the additional R-value required. For example, improving a loft from 2.3 W/m²K to 0.16 W/m²K needs an added R-value of 5.82 m²K/W.
- Convert R-Value to ThicknessMultiply the required R-value by the thermal conductivity (λ) of your insulation material. Mineral wool has a λ of about 0.035 to 0.044 W/mK; rigid PIR boards (Kingspan, Celotex) range from 0.022 to 0.028 W/mK. For 5.82 m²K/W using mineral wool at 0.044 W/mK, you need 256 mm. Using PIR at 0.022 W/mK, you need 128 mm. The λ value appears on every insulation product label.
- Measure What You Already HaveClimb into the loft or inspect a cavity wall through an electrical outlet or vent (turn off the power first). Measure the existing insulation thickness with a tape measure. If it’s compressed, damp, or has gaps, its effective R-value is lower than the label claims—patch the damaged areas before adding more. Wet insulation needs replacing, not topping up.
| Material | Thermal Conductivity (λ) | Thickness for R = 5.8 m²K/W |
|---|---|---|
| Mineral wool (glass or rock) | 0.035–0.044 W/mK | 203–255 mm |
| PIR / PUR boards (Kingspan, Celotex) | 0.022–0.028 W/mK | 128–162 mm |
| Expanded polystyrene (EPS) | 0.030–0.038 W/mK | 174–220 mm |
| Sheep’s wool | 0.038–0.040 W/mK | 220–232 mm |
Managing Condensation Risks with Insulation
Thicker insulation does not always stop damp. Condensation forms when warm, moist air meets a cold surface inside walls. Insulation changes wall temperatures but can trap moisture if not installed with vapour control.
Condensation happens behind insulation if water vapour from inside the home passes through gaps and hits a cold layer. This leads to mould, rot and damage. The key is to block vapour movement before it reaches cold surfaces.
Install a vapour control layer on the warm side of insulation, usually a plastic sheet or foil-backed membrane. It stops moist air entering the wall cavity. Seal all joints and edges carefully to make it continuous.
Ventilate the home to reduce indoor humidity. Use extractor fans in kitchens and bathrooms and keep air flowing through rooms. This lowers the amount of water vapour reaching the walls.
Common pitfalls include missing or damaged vapour barriers, gaps around pipes or cables, and installing insulation without checking for existing damp. These mistakes let moisture bypass the insulation and cause problems.
If insulation is wet or mouldy, it needs replacing. Drying it out rarely works because trapped moisture returns. Fix sources of moisture first, then install vapour control and new insulation to prevent recurrence.
Common Insulation Pitfalls and How to Avoid Them
Adding insulation on top of old insulation is often tempting but risky. If the old layer is damp, compressed or poorly installed, adding more will trap moisture and reduce overall effectiveness.
Avoid thermal bridges by sealing gaps and joints before installing insulation. Use continuous insulation layers and fit around obstacles carefully. Overlapping and tight fitting matter more than thickness alone.
Cost and performance trade-offs are real. Higher R-value insulation costs more but saves more energy long term. Cheap insulation installed badly wastes money and can cause damage. Choose quality materials and professional installation when possible.
Old insulation that is damaged, wet or mouldy should be removed and replaced. Repairing or covering it usually hides problems and reduces effectiveness. Inspect existing insulation before deciding to add more.
If replacing old insulation, remove it fully, fix any damp or structural issues, then install new insulation with proper vapour control. This ensures the new layer works as intended and lasts longer.
Additional Considerations for Different Home Areas
Internal wall insulation is often the best option for terrace homes where external insulation is limited by building regulations or conservation areas. Aim for a thickness of 40 to 60 mm of high-performance insulation board to balance thermal improvement with space loss.
Behind radiators, insulation can reduce heat loss through external walls. A thin, reflective insulation panel of about 10 to 15 mm thickness placed directly behind the radiator improves room warmth without requiring major work.
| Home Area | Recommended Thickness (mm) | Notes |
|---|---|---|
| Lofts | 270 to 300 | Thicker layers reduce heat loss; use mineral wool or cellulose. |
| Walls (cavity) | 100 to 150 | Depends on cavity width; ensure full fill with foam or mineral wool. |
| Floors | 50 to 100 | Rigid insulation under floorboards or screed; thicker for ground floors. |
| Extensions | 100 to 150 | Match existing walls; consider airtightness and vapour control. |
| Retrofit Walls | 40 to 60 (internal) | Use insulated plasterboard to avoid external changes. |
For lofts, increasing insulation thickness to 270 mm or more is standard to meet UK regulations. Use materials that maintain loft ventilation and prevent moisture build-up.
Floors benefit from rigid insulation boards between joists or under screed layers, typically 50 to 100 mm thick. This reduces cold floors and heat loss, especially in ground-floor rooms.
Extensions offer a chance to install insulation that meets current building regulations. Walls should have at least 100 mm of insulation, combined with vapour control layers to prevent condensation.
Retrofitting insulation inside existing walls often means using insulated plasterboard or thin rigid boards. This preserves external appearance but reduces room size slightly.
Unique building types, such as period homes with solid walls or timber frames, need specialized solutions. Solid walls require internal or external insulation systems designed to manage moisture. Timber-framed homes benefit from breathable, flexible insulation materials to avoid trapping dampness.
Extensions and retrofits should always be planned to maintain airtightness and proper ventilation. Vapour control layers and seals around insulation prevent condensation and mould growth.
- Check Building RegulationsVerify minimum insulation thicknesses for your home area and project type to comply with UK standards.
- Choose Suitable MaterialsSelect insulation compatible with your wall or floor type to avoid moisture problems.
- Plan for VentilationEnsure lofts and retrofits maintain ventilation paths to prevent condensation.
- Install Vapour Control LayersAdd vapour barriers on the warm side of insulation to reduce damp risk.
Frequently Asked Questions
Can I just add more insulation on top of old insulation?
How do I find my current U-value?
Does thicker insulation always prevent damp?
What is the best insulation for off-grid homes in high winds?
How to fix a rip in insulation?
What thickness of insulation do I need for a solid wall?
We cover improving heat retention in conservatories in its own guide.
The other half of this decision is keeping rooms warm with rugs.