Cold spots on walls can lead to increased energy bills and discomfort in your home. Fortunately, there are several methods to add insulation to your walls without the need for extensive renovations or removing existing wallpaper.
How to Insulate Walls Without Removing Wallpaper
You can insulate walls without removing wallpaper by using injection foam or thermal lining paper. These methods let you add insulation behind existing surfaces or on top of wallpaper, preserving your room’s look while improving energy efficiency.

Start by identifying your wall type and insulation needs. Walls with drywall or plaster over wood or metal studs can be insulated with injection foam, which fills cavities without demolition. If your wall is solid or you want a DIY option, thermal lining paper adds a thin insulating layer on the wallpaper surface.
Injection foam insulation is a professional or advanced DIY method that sprays expanding foam into wall cavities through small drilled holes. This foam seals gaps, blocks air leaks, and delivers a high R-value to keep heat in. It works well for retrofitting insulation behind wardrobes or furniture without removing them, as the foam fills the cavity behind walls.
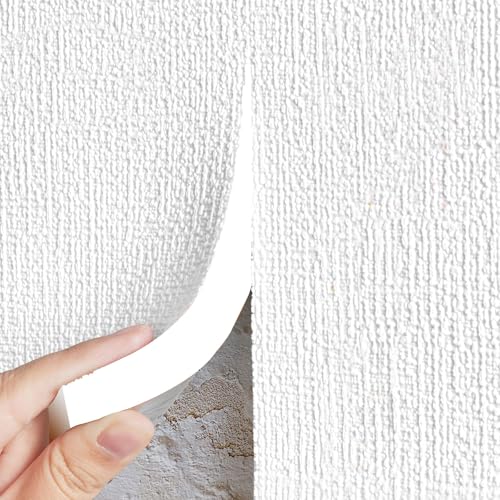
Thermal lining paper is a thin, reflective material you apply directly over wallpaper using adhesive. It reduces heat loss by reflecting radiant heat back into the room. This method is less effective than foam but is simple, safe, and requires no wall damage or professional tools.
If you want to add insulation without removing drywall, injection foam is the main option. It requires drilling small holes, then sealing them after application. The price depends on wall area and foam type but generally costs less than full drywall removal and replacement.
To find injection foam insulation services near you, search for local insulation contractors or ask hardware stores for recommendations. For DIY foam kits, look for products that include a spray gun and safety gear, like the BEEST FullStop Spray Foam Insulation Kit.
- Identify Wall TypeCheck if your walls have cavities behind drywall or plaster. Solid walls won’t accept injection foam.
- Choose Insulation MethodSelect injection foam for cavity walls or thermal lining paper for surface insulation on wallpaper.
- Prepare Wall for InjectionLocate studs and avoid wiring. Drill small holes for foam application if using injection foam.
- Apply InsulationSpray foam into cavities or glue thermal lining paper to wallpaper.
- Seal and FinishFill drilled holes with matching filler and paint if needed.

Understanding Wall Structure and Insulation Needs
Adding insulation to existing walls without removing wallpaper requires knowing what kind of wall you have and its current insulation status. Most homes have either solid walls or cavity walls. Solid walls are a single layer of masonry or timber, while cavity walls have two layers separated by a gap, which may hold insulation or air.
Check if your walls have cavities by inspecting construction documents or using a drill to make a small test hole in an inconspicuous spot. If you find a cavity, you can fill it with injection foam or blown-in insulation without disturbing the wallpaper. Solid walls usually need internal insulation solutions like thermal lining paper or insulated plasterboard applied over the wallpaper.
- Assess Thermal PerformanceUse an infrared thermometer or thermal camera to spot cold spots on your walls, which indicate poor insulation or heat loss areas.
- Locate Drafts and Air LeaksFeel for cold air near windows, doors, electrical outlets, and baseboards. Seal these leaks with weatherstripping or caulk to improve overall insulation.
- Determine Wall Cavity PresenceDrill a small hole to check for a cavity or consult a professional if unsure. This step guides which insulation method fits your wall type.
- Inspect Doors and WindowsCheck for gaps around frames. Use foam sealant or weatherstripping designed for doors and windows to insulate without damaging wood or wallpaper.
Doors and windows lose a surprising amount of heat. Insulating them effectively without damaging surrounding walls or wood means using non-invasive methods like adhesive-backed foam strips or removable draft stoppers. Avoid heavy modifications that risk peeling wallpaper or damaging wood trim.
If your walls are uneven or cracked, consider consulting guidance on how to insulate uneven or cracked walls to avoid wallpaper damage during insulation upgrades. For kitchens or rooms with specific needs, methods may differ slightly but follow the same assessment principles.
This understanding helps you pick the right insulation method and avoid unnecessary removal of wallpaper or damage to doors and windows. For more on insulating without renovation, see how to heavily insulate a room without damaging walls how to heavily insulate a room.
Step-by-Step Guide for Injection Foam Insulation
- Gather Tools and MaterialsPrepare the injection foam kit, drill with a masonry or wood bit sized for the foam nozzle, safety goggles, gloves, a dust mask, and a putty knife or sealant for hole repair. Use a spray foam kit like the BEEST FullStop, which includes the applicator gun and safety gear for a complete setup.
- Drill Access HolesMark a grid pattern on the wall, spacing holes about 12 to 16 inches apart. Drill holes through the wallpaper and drywall or plaster just large enough for the foam nozzle. Avoid drilling too close to electrical wiring or plumbing. Clean dust from holes before injecting foam.
- Inject Foam InsulationAttach the foam can to the applicator gun and insert the nozzle into the drilled hole. Slowly dispense foam to fill the cavity behind the wall without overexpanding. Withdraw the nozzle gradually while dispensing to fill the space evenly. Allow foam to cure according to the manufacturer’s instructions.
- Seal Holes and Restore Wall SurfaceOnce the foam is fully cured, cut off any excess foam flush with the wall surface. Fill the drilled holes with spackling compound or plaster. Sand smooth when dry and repaint or wallpaper over the repaired spots as needed to restore the wall appearance.
Alternative Method: Blown-In Loose Fill Insulation
Blown-in loose fill insulation works best in walls with existing cavities that are empty or poorly insulated. This method suits older homes where drilling small holes into the wall surface is possible without damaging wallpaper or interior finishes.
- Locate Wall CavitiesUse a stud finder or wall scanner to identify cavity spaces and avoid electrical wiring or plumbing.
- Drill Access HolesDrill small holes, typically 3/4 inch to 1 inch in diameter, in inconspicuous spots such as inside closets or behind furniture, to minimize visual impact.
- Blow in InsulationUse a specialized blowing machine to fill the cavities with loose fill insulation material like cellulose or fiberglass, ensuring even coverage.
- Seal HolesPatch and paint the drilled holes carefully to blend with the existing wall surface and wallpaper.
The main benefit of blown-in insulation is it improves thermal performance without removing wallpaper or major wall demolition. It can fill irregular or hard-to-reach spaces better than rigid panels. Loose fill materials like cellulose also offer good air sealing and soundproofing qualities.
Drawbacks include the need for professional equipment and skill, as improper installation can leave gaps or settle over time. Drilling holes risks damaging wallpaper if not done carefully. Blown-in insulation adds weight to the wall, which may be a concern for very old or fragile structures.
| Aspect | Details |
|---|---|
| Best for | Walls with accessible cavities and minimal interior damage |
| Installation | Requires drilling small holes and professional blowing equipment |
| Materials | Cellulose, fiberglass, or mineral wool loose fill |
| Pros | Improves insulation without wallpaper removal; fills irregular spaces |
| Cons | Requires skillful installation; potential wallpaper damage; added wall weight |
DIY Solution: Thermal Lining Paper
Thermal lining paper is a thick, reflective wallpaper-like material designed to reduce heat loss through walls. It works by reflecting radiant heat back into the room and providing a small layer of insulation between the wall and the room.
- Prepare the Wall SurfaceClean the wallpaper and wall gently to remove dust and grease, ensuring good adhesion.
- Measure and Cut PaperCut thermal lining paper strips to fit the wall height, allowing for trimming around outlets and fixtures.
- Apply AdhesiveUse wallpaper paste recommended by the thermal lining paper manufacturer, applying it evenly to the back of the paper.
- Hang the PaperCarefully position the strips on the wall, smoothing out air bubbles and aligning edges accurately.
- Seal Joints and EdgesUse a roller or brush to press seams firmly and prevent air gaps that reduce insulation effectiveness.
Thermal lining paper improves warmth modestly and is best for rooms where removing wallpaper is not an option. It is an affordable, low-risk DIY upgrade that does not alter wallpaper appearance significantly.
Limitations include its relatively low R-value compared to foam or blown-in insulation. It is not a substitute for cavity insulation but works as a supplementary barrier against heat loss and cold drafts.
Final Recommendations for Wall Insulation
Start by conducting a thorough home energy audit. This identifies where your walls lose the most heat and shows what type of insulation will be most effective. You can hire a professional or use a DIY thermal camera to spot cold spots behind wallpaper.
Professional installation is often the best choice for long-term results. Experts can apply injection foam or blown-in insulation with precision, ensuring full coverage without damaging wallpaper. They also follow safety standards and building codes, reducing risks of moisture buildup or uneven insulation.
Combining insulation methods can improve performance. For example, injection foam fills cavities deeply, while thermal lining paper adds a reflective barrier that reduces radiant heat loss. Using both addresses different heat transfer modes and delivers better energy savings.
Keep in mind the cost and time for each method. Injection foam and blown-in insulation require specialized equipment and may cost more upfront but last longer. Thermal lining paper is a lower-cost DIY option but offers less R-value and may suit milder climates or supplemental use.
- Schedule an energy auditCheck for drafts, cold spots, and current insulation levels behind wallpaper.
- Choose insulation methodsDecide between injection foam, blown-in insulation, thermal lining paper, or a combination.
- Consult a professionalGet advice or hire experts for installation to avoid damage and ensure effectiveness.
- Monitor resultsAfter installation, track energy bills and comfort to confirm improvements.
Frequently Asked Questions
What are the best insulation options for older homes?
Can I use thermal lining paper over existing wallpaper?
How much does injection foam insulation cost?
Is blown-in insulation better than foam?
What should I do if my walls have no cavities?
How can I identify drafts in my home?
Before you buy anything, it is worth looking at insulating behind skirting boards.
We go through tips for window insulation step by step in a separate article.