
Tiny box rooms, such as converted closets or under-stair spaces, often struggle with cold spots and drafts due to poor insulation. Insulating these areas effectively can enhance comfort and reduce energy bills.
How to Insulate a Tiny Box Room for Comfort
To insulate a tiny box room for comfort, first seal all air leaks around doors, windows, and outlets to stop drafts. Then add insulation using suitable materials like cotton batts or foam boards to slow heat loss and keep the room warm.

Tiny box rooms are challenging because their small volume heats and cools quickly, and they have less wall space to add insulation without sacrificing room size. Air leaks can cause drafts that ruin comfort even if the walls are insulated.
Household materials can help start insulation cheaply. Thick blankets or quilts taped over windows reduce heat loss. Cardboard or foam sheets cut to fit behind radiators or on walls add a basic insulating layer. These are temporary but improve comfort while you plan a full solution.
To heavily insulate a tiny room, use dense, high-R-value materials like cotton batt insulation or rigid foam panels. Cotton batts fit between wall studs or behind paneling without adding much thickness. Foam boards are good for covering entire walls or ceilings but reduce room space slightly.
Insulating a room without traditional insulation means maximizing air sealing and adding reflective barriers. Weatherstrip doors and windows, use caulk or spray foam on gaps, and place reflective foil behind heaters or on walls to bounce heat back into the room. This approach cuts heat loss when adding bulk insulation is not possible.
- Seal Air LeaksCheck around windows, doors, electrical outlets, and baseboards for gaps. Use weatherstripping, caulk, or spray foam to seal these leaks tightly.
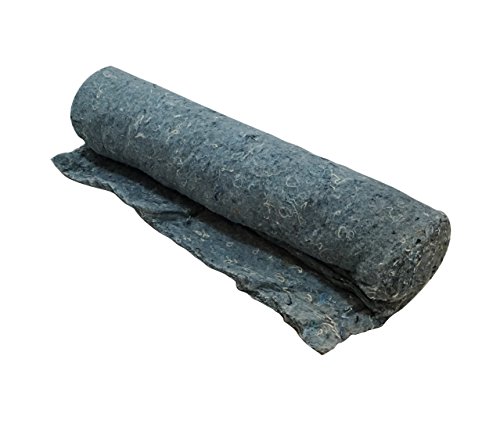
- Choose Insulation MaterialPick cotton batt insulation like Frost King CF1 for a safe, easy-to-handle option or rigid foam panels for a slim profile with high insulation value.
- Measure and Cut InsulationMeasure the wall or ceiling cavities and cut insulation to fit snugly between studs or joists without compressing the material.
- Install InsulationFit the insulation pieces into place, ensuring full coverage with no gaps or compression that reduce effectiveness.
- Add a Vapor Barrier if NeededIn humid climates or rooms prone to moisture, install a vapor barrier over insulation to prevent condensation and mold growth.
- Finish the WallsCover insulated walls with drywall or paneling to protect insulation and improve room appearance.
| Appliance | Watts | Per hour | Per day (8 h) | Per month (30 days) |
|---|---|---|---|---|
| 1,500 W electric heater | 1,500 W | 26¢ | $2.04 | $61.20 |
Understanding the Challenges of Tiny Box Rooms
Insulating a tiny box room presents unique challenges that differ from larger spaces. First, these rooms often have limited air volume, which means temperature and humidity can change rapidly. This makes controlling indoor climate more difficult and increases the risk of condensation and mold if moisture is not managed properly.
Thermal bridging is a major concern in small rooms. It happens when heat passes through structural elements like wall studs, window frames or poorly insulated corners, creating cold spots. These spots can cause discomfort and reduce the overall effectiveness of insulation, as heat escapes through these bridges even if the rest of the wall is insulated.
You can insulate a room with no heat source, but it will only slow the loss of heat from adjacent spaces or the sun. Without a heat source, the room will remain cold but more stable in temperature. Adding insulation helps keep cold air out by sealing leaks and adding a barrier in walls and ceilings, but it does not generate warmth.
To insulate cold air in your room, focus on sealing all drafts around doors, windows, vents and electrical outlets. Use weatherstripping, caulk and foam sealants. Then add insulation material appropriate for the walls, ceiling and floor to reduce heat transfer. This blocks cold air from penetrating and warm air from escaping.
The limited size of a tiny box room means air circulation is restricted. This can cause humidity to build up quickly, especially if the room is occupied or has moisture sources like plants or drying clothes. Proper ventilation or a dehumidifier may be needed to prevent moisture problems after insulation is installed.
Small rooms also tend to hold heat differently. They warm up and cool down faster than larger rooms, so heating systems must be responsive. Insulation reduces heat loss but does not replace the need for a reliable heat source controlled for short cycles.
Because of these factors, insulating a tiny box room requires careful attention to sealing, thermal bridging, and moisture control. These challenges affect how insulation performs and how comfortable the room feels. For heating advice tailored to small rooms, see How to Heat a Small, Cold Box Room Efficiently.
Choosing the Right Insulation Material
A good way to insulate a room wall is to add a layer of rigid foam board or mineral wool to the interior side, which reduces thermal bridging by covering the studs and blocking heat flow through the framing.

Several insulation materials work well in tiny box rooms, each with pros and cons you should weigh before deciding.
| Insulation Material | Pros | Cons | Best Use |
|---|---|---|---|
| Fiberglass Batts | Affordable; widely available; easy to install | Can lose effectiveness if compressed; irritates skin; needs vapor barrier | Standard wall cavities with space for framing |
| Rigid Foam Board | High R-value per inch; blocks thermal bridging; moisture resistant | More expensive; requires careful sealing at joints | Interior wall insulation to reduce thermal bridging |
| Mineral Wool | Fire resistant; soundproofing qualities; water resistant | Heavier than fiberglass; more costly; harder to cut | Interior walls and ceilings where fire resistance matters |
| Spray Foam | Seals air leaks; high R-value; moisture barrier | Expensive; requires professional installation; off-gassing concerns | Small gaps, irregular cavities, and tight spaces |
| Reflective Foil | Reflects radiant heat; thin and lightweight | Works only with an air gap; less effective in cold climates | Supplemental insulation in warm climates or over existing insulation |
Fiberglass batts fit standard stud walls but do not stop thermal bridging through the wood framing. Adding a layer of rigid foam board or mineral wool on the interior side blocks heat flow more effectively. This layered approach raises the overall R-value without losing wall space.
Rigid foam board is a top choice for tiny rooms because it adds insulation without thickening walls much. It also acts as a vapor retarder and reduces drafts when sealed tightly at seams and edges.
Mineral wool is denser and better at soundproofing, which helps in small rooms where noise can feel amplified. Its fire resistance adds safety in tight spaces.
Spray foam provides an air seal and high insulation value but is costly and usually requires professional application. It works well for sealing gaps around windows or in irregular cavities that standard batts can’t fill.
Reflective foil insulation works by reflecting heat rather than stopping conduction. It needs an air gap to be effective and is less useful in cold climates where heat loss is mainly through conduction.
To add insulation inside a tiny box room without losing much space, install rigid foam board over existing walls, then cover it with drywall or paneling. Seal the edges with foam sealant or tape to prevent air leaks.
Consider the room’s moisture levels and ventilation when choosing insulation. Materials like mineral wool and rigid foam resist moisture better than fiberglass, reducing mold risk in small, poorly ventilated spaces.
Choosing the right insulation depends on your budget, the room’s construction, and whether you prioritize ease of installation, fire resistance, or moisture control. For a simple upgrade, rigid foam board inside the wall is often the most effective and space-saving solution.
Addressing Moisture and Ventilation Issues
Insulating a duplex box requires special attention to moisture control. These spaces often have limited air circulation, making them prone to condensation and mold growth.
You can insulate and drywall a utility room, but only after addressing moisture risks. Utility rooms produce humidity from appliances and plumbing, so vapor barriers and ventilation are essential before installing insulation and drywall.
A vapor barrier is a layer that blocks water vapor from moving through walls. In cold climates, install it on the warm side of insulation. This stops moisture from indoor air condensing inside the wall cavity.
Air gaps behind rigid foam or between insulation layers improve drying. They allow trapped moisture to escape instead of accumulating.
Condensation occurs when warm, moist air meets a cold surface. To prevent this, keep interior surfaces warm with continuous insulation and seal all air leaks. Use exhaust fans or vents to remove humid air in utility rooms and bathrooms.
- Check for Moisture SourcesIdentify appliances, plumbing, or leaks that add humidity.
- Install Vapor BarrierPlace polyethylene sheet or foil-backed insulation on the warm side of the wall.
- Create Air GapUse furring strips or foam board to maintain a small gap behind drywall.
- Add VentilationInstall exhaust fans or vents to remove moist air outside.
Proper moisture control protects your insulation investment and keeps the room healthy. Without it, insulation can lose effectiveness and structural damage may occur.
Cost Analysis: DIY vs. Professional Help
To easily insulate a room with mattresses, you can attach them temporarily to walls to add bulk insulation. This is low cost but not long-lasting or code-compliant.
Warming a freezing box room with one window starts with sealing drafts around the window and adding insulation to walls. A small electric heater designed for the room size can supplement heat.
DIY insulation materials vary by type. Rigid foam board typically sells by the sheet or panel. Mineral wool batts come in rolls or precut sizes for walls. Vapor barriers are thin plastic sheets to control moisture. Tools and fasteners are extra.
| Material | Cost per Square Foot |
|---|---|
| Rigid foam board | Varies by material and thickness |
| Mineral wool batts | Varies by material and thickness |
| Vapor barrier | Varies by type and size |
DIY saves labor costs but demands time, skill and proper tools. Mistakes like missing vapor barriers or poor sealing reduce effectiveness and can cause damage.
Professional insulation installation includes materials and labor. Pros ensure correct vapor barrier placement, full coverage, and code compliance, which can save costly mistakes and improve comfort.
Hire a professional if your room has moisture issues, complex framing, or you lack insulation experience. They also handle drywall installation after insulating.
DIY suits simple, dry rooms and those comfortable with tools. Professionals fit where safety, building codes, or warranty matter.
Frequently Asked Questions
What are the best materials to insulate a small box room?
Can I insulate a room that doesn’t have heating?
How do I prevent condensation in an insulated room?
What is thermal bridging and how does it affect insulation?
Is it necessary to use a vapor barrier when insulating?
What are the signs that I need professional help with insulation?
We go through keeping utility rooms warm step by step in a separate article.
Before you buy anything, it is worth looking at keeping tiny homes warm.
